


Help Icon Illustrator tutorial
1. Draw a circle.
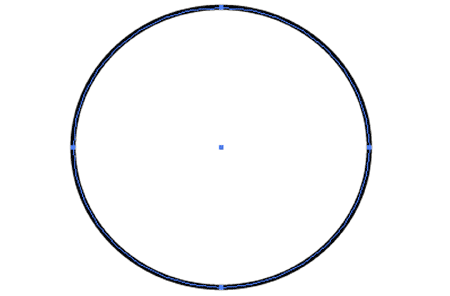
2. Now fill the circle with the gradient as shown in below. Also give a stroke to it.

3. Type X and select 'Create Outlines' by Right clicking on it . Apply gradient and stroke to it. Here we use grey for gradient and '6 pt' for stroke.

4. Take a copy of the circle and make something similar to the one given below. Use the Pen Tool for this purpose.

5. Delete the bottom part of it by selecting the both with the selection tool and clicking on Divide.

6. Place the second circle over the original circle and select Go to Object > Path > Offset Path. Use -'10 px'. The outside part of the circle must be deleted and give it a black/white gradient without stroke and place it on the Screen.

7. You have successfully completed your Help Icon.


Stuff
- » Home
- » About us
- » Portfolios
- » Tutorials
- » Testimonials
- » Contact
- » T&C
- » Sitemap